Mastering Whale Drawing: From Simple Sketches To Majestic Art
Have you ever gazed at the ocean's vastness and felt an overwhelming desire to capture the silent majesty of its largest inhabitants on paper? The art of whale drawing offers a unique and deeply satisfying creative outlet, allowing you to bring these gentle giants to life with your own hands. From the playful curves of a cartoon whale to the intricate details of a realistic humpback, the journey of drawing a whale is an adventure in itself, accessible to artists of all ages and skill levels.
My own fascination with these magnificent creatures began the first time I saw a whale. Their sheer size, their graceful movements, and the profound mystery of their underwater world immediately captivated me. Wanting to immortalize that beauty, I started drawing whales. At first, all I could manage were simple shapes, but even those basic sketches filled me with joy. Gradually, my skills improved, and I learned to add more details, capturing not just their form but also a hint of their spirit. This guide is designed to share that joy and help you embark on your very own whale drawing adventure, offering techniques and inspiration to create your masterpiece.
Table of Contents
- Why Draw Whales? Endless Inspiration from the Deep
- Essential Art Supplies for Your Whale Drawing Journey
- The Foundation: Basic Shapes and Anatomy
- Step-by-Step Whale Drawing Techniques for Beginners
- Exploring Different Whale Drawing Styles: From Realistic to Chibi
- Adding Depth and Detail: Beyond the Outline
- Finding Inspiration and Resources for Your Whale Art
- Sharing Your Masterpiece: Joining the Art Community
Why Draw Whales? Endless Inspiration from the Deep
Whales, with their dramatic forms and majestic beauty, offer endless inspiration for artists. Beyond their compelling shapes, the environment in which they reside—the ocean—is just as beautiful to draw, providing a rich backdrop for any whale drawing. Whether you're a fan of sea creatures or simply looking for a new artistic challenge, whales present a unique opportunity to explore form, light, and emotion through art.
The act of drawing itself is incredibly therapeutic. It allows you to slow down, observe, and connect with your subject on a deeper level. When you're drawing a whale, you're not just putting lines on paper; you're contemplating the vastness of the ocean, the incredible adaptations of these animals, and their serene existence. This contemplative process can be incredibly relaxing and rewarding, offering a peaceful escape from the daily grind. Furthermore, the sheer variety of whale species means you'll never run out of unique subjects, each with its own distinct characteristics and charm.
Essential Art Supplies for Your Whale Drawing Journey
Before you dive into your whale drawing adventure, gathering the right art supplies is key. While you can certainly start with just a pencil and paper, having a few essential items can significantly enhance your experience and the quality of your artwork. Remember, this is a list of the supplies commonly used, but feel free to use whatever you have on hand or prefer.
- Pencils: A range of graphite pencils (HB, 2B, 4B, 6B) will allow you to create different line weights and shading. HB is good for initial sketches, while softer leads (like 4B or 6B) are excellent for darker lines and shadows.
- Erasers: A kneaded eraser is fantastic for lifting graphite gently without damaging the paper, and a standard plastic eraser is good for sharper corrections.
- Paper: Choose drawing paper that is smooth enough for fine lines but has enough tooth to hold graphite or other mediums. A sketchbook or journal is perfect for practice and collecting ideas.
- Color Mediums (Optional): If you want to add color, consider:
- Colored Pencils: Great for layering and detailed work.
- Watercolors: Excellent for capturing the fluidity of water and the subtle hues of whale skin.
- Acrylic Paints: For creating your own realistic whale drawing with teal, navy, black, and white paints, acrylics offer vibrant colors and good coverage.
- Markers: Good for bold lines and flat areas of color, especially for cartoon or chibi styles.
- Reference Images: While not a physical supply, having good reference photos is invaluable. You can find countless whale pictures online, offering tips and inspiration for your sketchbook or journal.
The beauty of art is that it doesn't require expensive tools to get started. Many artists create stunning pieces with very basic materials. The most important "supply" is your willingness to experiment and enjoy the process.
The Foundation: Basic Shapes and Anatomy
The process of drawing a whale, regardless of its species or style, is broken up into a few simple steps. We will start with a light general sketch, where we form the animal in its basic shapes to capture its form. This foundational step is crucial for accurate proportions and dynamic poses. Understanding basic whale anatomy will significantly improve your whale drawing, making it more believable and lively.
For most whales, you can begin by drawing a large oval or circle for the head, followed by a longer, tapering oval for the body. Connect these shapes with fluid lines. Think of the whale's body as a streamlined torpedo. Pay attention to the gentle curve of its back and the subtle arch of its belly. The tail, or fluke, is typically wide and powerful, while the pectoral fins (flippers) vary in size and shape depending on the species.
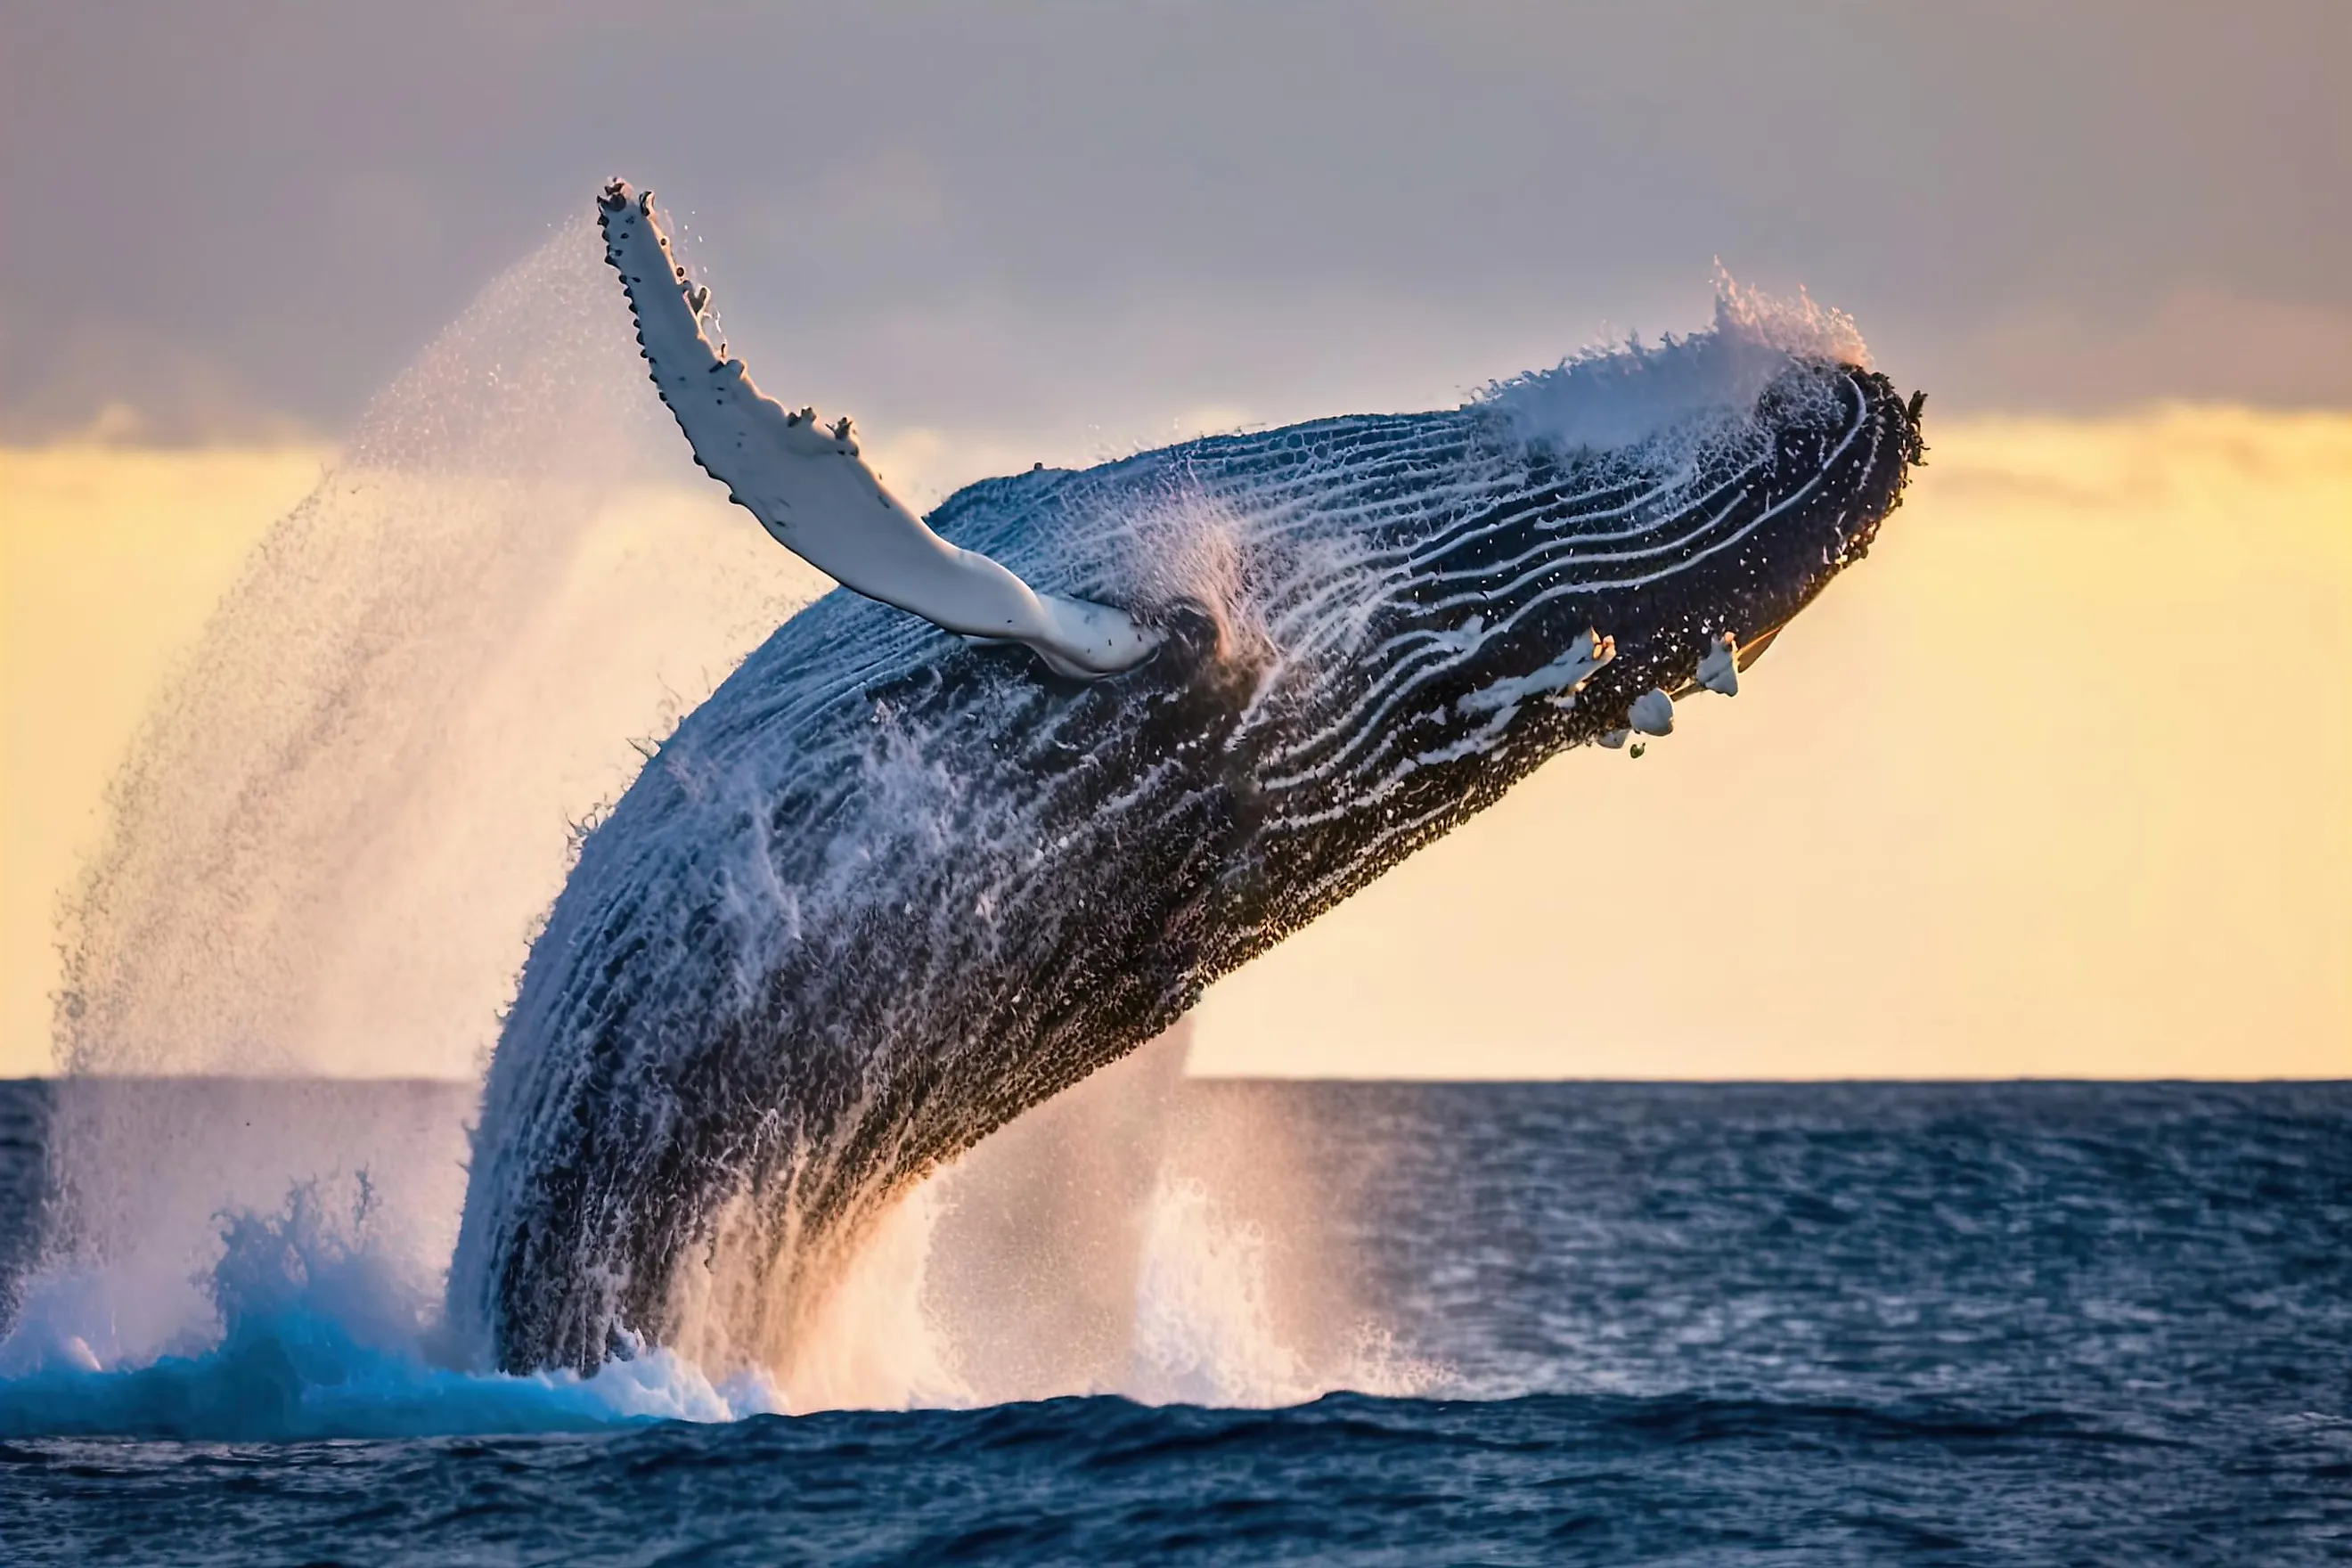
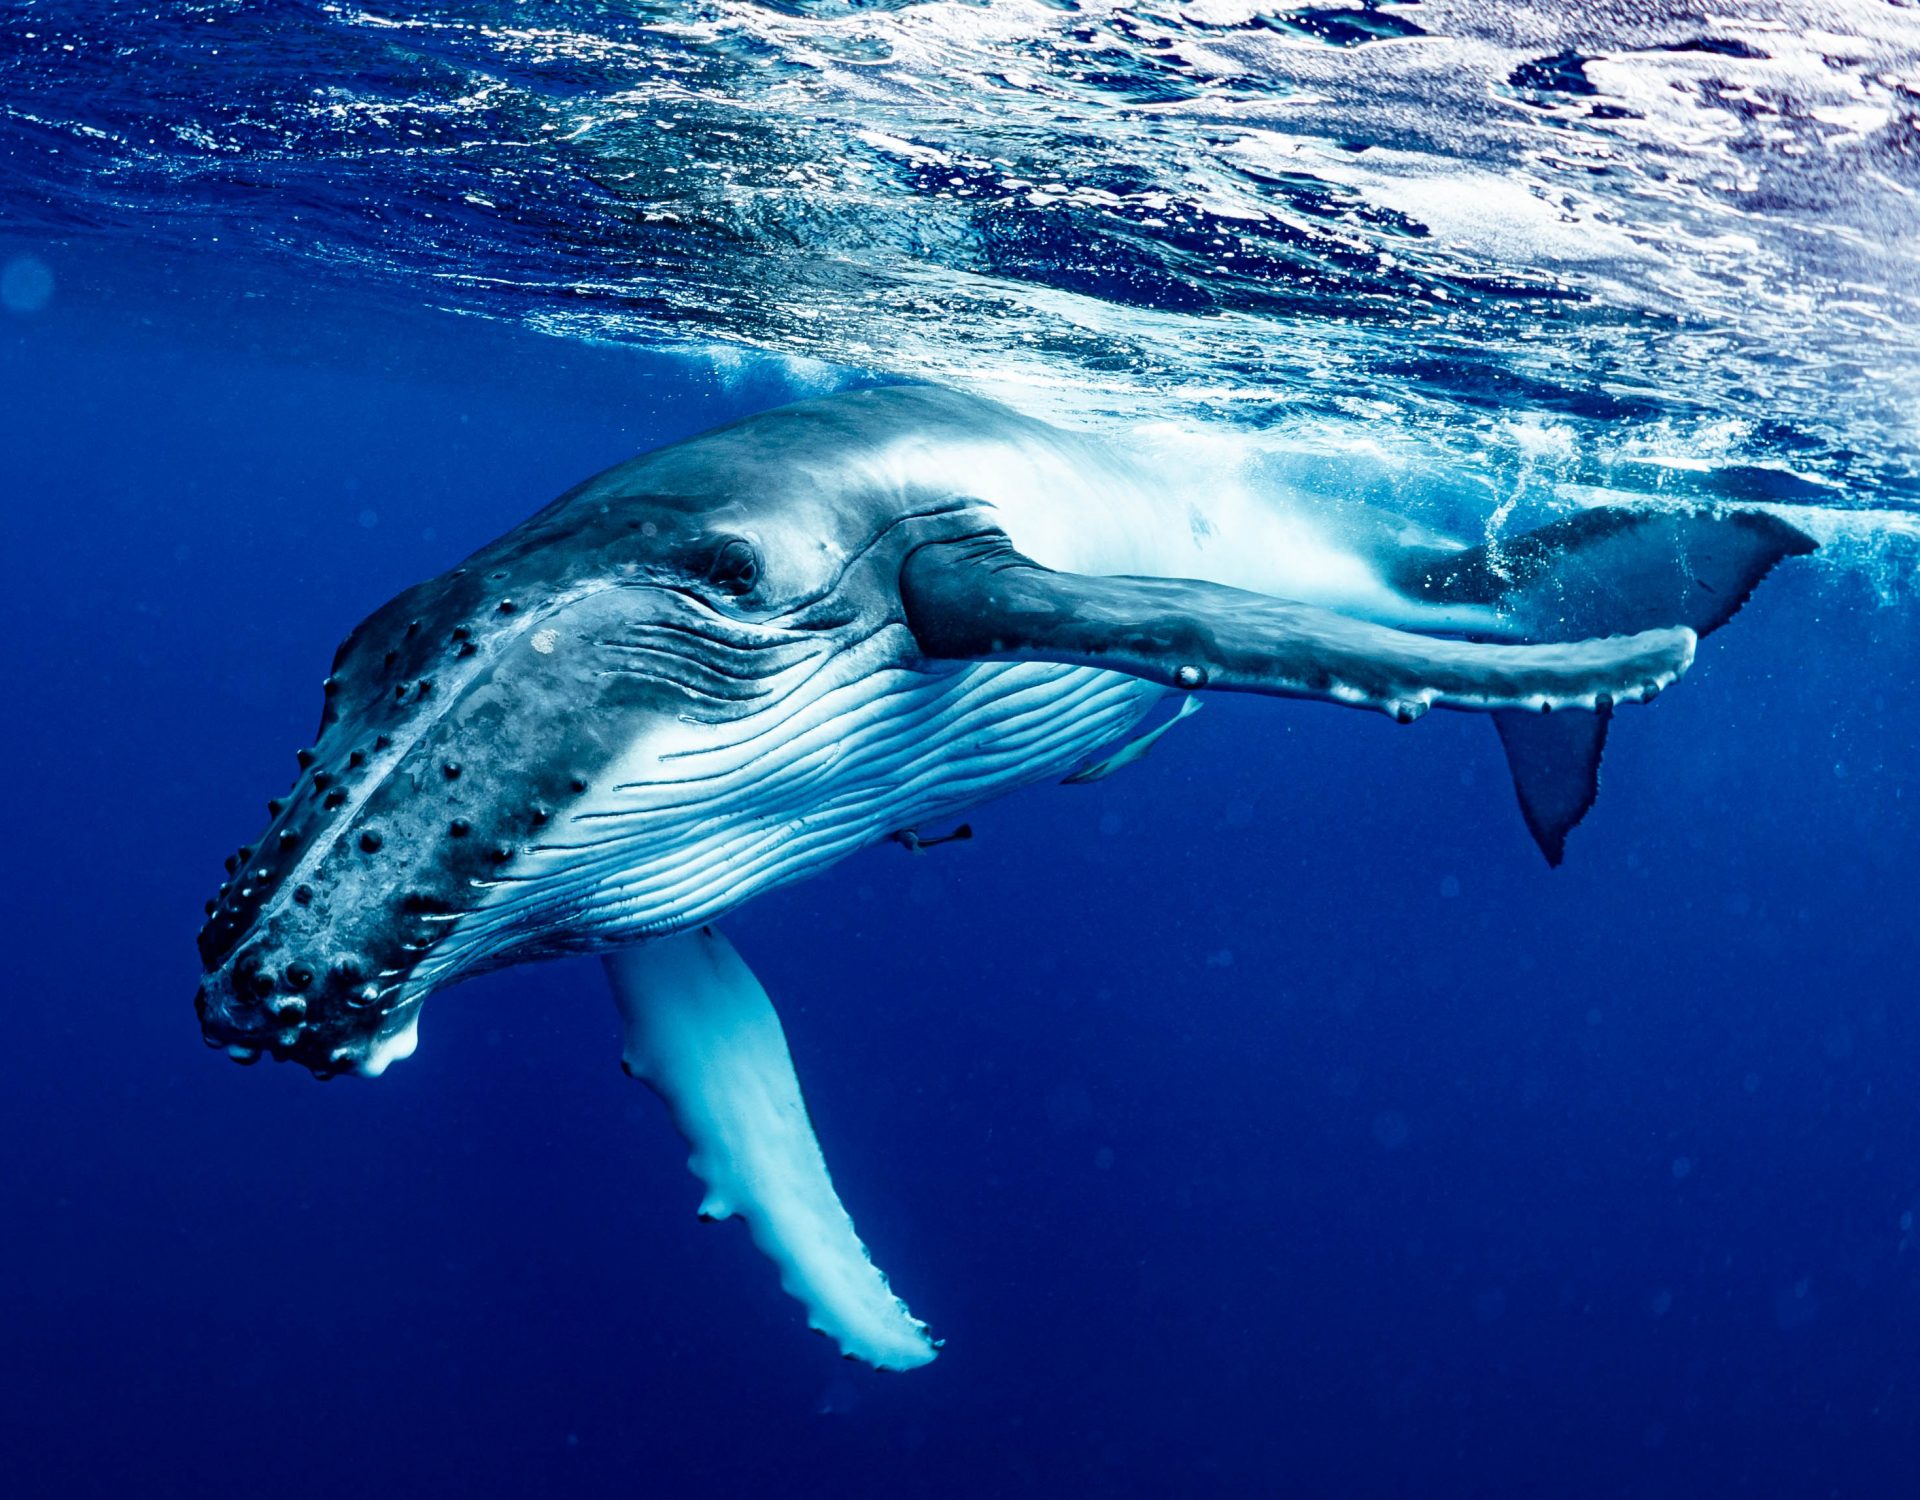
Humpback Whale: A Gentle Giant's Form
Today, Hadley and I are learning how to draw a humpback whale, a lesson that is a bit more advanced but still a lot of fun for everyone. Humpbacks are known for their distinctive long pectoral fins and the knobby protuberances on their heads. When drawing a humpback, emphasize these features:
- Head: Start with a rounded shape, then add the characteristic bumps (tubercles) along the top and front of the head.
- Lower Jaw: Begin by using long curved lines to outline the whale's lower jaw. Use one line for the top of the jaw, another for the bottom, and draw a short line at the corner of the mouth to suggest its wide grin or feeding posture.
- Flippers: These are exceptionally long, sometimes a third of the whale's body length. Draw them with a slight curve, tapering towards the end.
- Body: The body is robust but tapers towards the tail. Remember their distinct dorsal fin, which is often small and triangular.
- Fluke: The tail fluke is broad and deeply notched, often with unique patterns on the underside, which can be a fun detail to add if you're going for realism.
Killer Whale (Orca): Power and Grace
Today, Hadley and I are learning how to draw a killer whale or an orca. Orcas have a very distinct, powerful, and sleek form, making them a captivating subject for any whale drawing. Their striking black and white coloration is their most recognizable feature.
- Body Shape: Orcas have a more torpedo-like, robust body compared to the more elongated humpback. Start with a strong, oval-like shape for the main body.
- Dorsal Fin: This is perhaps the most iconic feature of an orca—a tall, triangular dorsal fin, especially prominent in males. Draw it upright and sharp.
- Pectoral Fins: Orca flippers are broad and paddle-shaped, less elongated than a humpback's.
- Head: The head is rounded, leading smoothly into the body.
- Coloration: The distinct white patches around their eyes (eye patch) and on their belly are crucial. Sketch these areas lightly first to ensure accurate placement before you commit to shading or coloring.
Step-by-Step Whale Drawing Techniques for Beginners
Learning how to draw a whale doesn't have to be daunting. The key is to break down the process into manageable steps. Easydrawforkids.com often shows different whale drawing techniques that you can use to create your own masterpiece. Here, we'll explore a couple of popular starting points.
The Easy Whale: Perfect for Kids and First-Timers
Kids and beginners alike can now draw a great looking easy whale! This method focuses on simplicity and basic shapes, making it incredibly approachable. It's often the first step in any whale drawing journey.
- Start with the Head: First, you draw a circle to form the whale’s head. This will be the anchor point for your entire drawing.
- Form the Body: Extend a large, curved line from the top of the head, curving gently downwards to form the whale's back. Then, from the bottom of the head, draw another long, curved line that sweeps upwards to form the belly. These two lines should eventually meet to create the basic body shape.
- Add the Tail Base: The left end (or whichever end you designate as the tail) should taper into a small curve, forming the whale’s tail base.
- Draw the Fluke (Tail): From the tail base, draw two curved lines extending outwards and then inwards to form the iconic whale tail (fluke). Make sure it looks symmetrical and powerful.
- Flippers: Add a simple teardrop or oval shape for a flipper on the side of the body.
- Details: Add a simple eye (a dot or small circle) and a gentle curved line for the mouth. You can also add a small blowhole on top of the head.
This method allows you to complete a basic whale drawing in about 30 minutes, making it perfect for quick sketches or for those just starting out.
Drawing a Funny Whale: Unleashing Your Imagination
Learn how to draw a funny whale and let your creativity run wild! This technique focuses less on anatomical accuracy and more on expressing personality and humor. Think about a cheerful whale floating in the ocean, showing off the biggest, happiest grin, having the best day ever, with its little tail wagging with joy!
- Exaggerated Shapes: Start with a very round, almost balloon-like body. The head can be disproportionately large or small for comedic effect.
- Expressive Features: Make the eyes big and sparkling, perhaps with long eyelashes or comical pupils. The mouth should be a wide, upturned smile.
- Dynamic Pose: Instead of a serene swim, imagine your funny whale jumping, splashing, or even balancing something on its nose. Its little tail can wag with joy, indicating movement and emotion.
- Accessories: Give your whale a tiny hat, a monocle, or even a bowtie! These small additions can dramatically increase the "funny" factor.
- Context: Place your whale in a humorous scenario. Is it wearing sunglasses on a tiny beach chair? Is it trying to juggle fish? The possibilities are endless when you're drawing a funny whale.
This approach encourages experimentation and is a wonderful way to develop your unique artistic voice while having a lot of fun.
Exploring Different Whale Drawing Styles: From Realistic to Chibi
One of the most exciting aspects of whale drawing is the ability to learn how to draw whales in different styles, from realistic to chibi, with a collection of easy and relaxing drawing ideas. Each style offers a unique way to interpret these magnificent creatures.
- Realistic: This style focuses on accuracy in anatomy, proportion, and texture. You'll pay close attention to the subtle curves of the body, the texture of the skin (smooth, barnacle-covered, scarred), and the way light interacts with the water. For a realistic whale drawing, consider using teal, navy, black, and white paints to capture the ocean's depth and the whale's natural coloring. This approach often requires more observation and patience, but the results can be incredibly rewarding, bringing the whale to life on your canvas.
- Cartoon/Comic: This style simplifies shapes, exaggerates features, and often uses bold outlines and flat colors. It's perfect for creating characters with personality, like the "funny whale" we discussed. Focus on expressive eyes and dynamic poses.
- Chibi: Originating from Japanese anime and manga, chibi means "small" or "cute." Chibi whales have oversized heads, tiny bodies, and exaggeratedly cute features. They are often drawn with very simple lines and bright, appealing colors. This style is incredibly popular for its charm and ease of execution.
- Stylized/Abstract: This involves interpreting the whale's form in a unique artistic way, perhaps using geometric shapes, intricate patterns, or non-traditional colors. It's about capturing the essence of the whale rather than its exact likeness.
Don't be afraid to experiment with different styles. Each one will teach you something new about form, line, and expression. Trying various styles can also help you discover what kind of whale drawing resonates most with your personal artistic vision.
Adding Depth and Detail: Beyond the Outline
Once you have the basic outline and form of your whale, it's time to add depth and detail. This is where your drawing truly comes alive. Gradual improvements in your skills will allow you to add details like texture, shading, and environmental elements.
- Shading: Use shading to give your whale a three-dimensional appearance. Identify your light source and apply darker tones to areas that would be in shadow, and lighter tones to areas receiving direct light. This creates volume and form. For realistic whale drawing, subtle gradients are key.
- Texture: Whales have surprisingly varied skin textures. Some are smooth, while others, like humpbacks, can have barnacles, scars, or callosities. Adding these small details can significantly enhance the realism and interest of your drawing.
- Water Effects: Since whales reside in the ocean, incorporating water is essential. This could be subtle ripples around the whale's body, splashes from a breach, or the shimmering light filtering through the water. Drawing the ocean environment around the whale makes the scene more dynamic and believable. Consider using different shades of blue and green to depict the water's depth and movement.
- Background Elements: Think about what else might be in the whale's habitat. Other marine life, distant icebergs, or even a faint horizon line can add context and narrative to your whale drawing.
Remember that details don't have to be overwhelming. Sometimes, a few well-placed lines or carefully rendered textures can convey a lot without overcomplicating the drawing.
Finding Inspiration and Resources for Your Whale Art
Inspiration is everywhere when it comes to whale drawing. The vastness of the internet provides an incredible repository of visual references and educational content. You can find whale pictures, tips, and inspiration for your sketchbook or journal with ease.
- Online Image Libraries: Websites like Pinterest, Unsplash, and Pixabay host millions of high-quality photos. A quick search for "whale drawing photos" can yield over 66,568 whale drawing photos for download, offering an endless supply of poses, species, and environmental contexts. Pinterest, in particular, is a great place to find and save ideas about whale drawing, creating boards dedicated to different whale species or drawing styles.
- Documentaries and Videos: Watching nature documentaries about whales can provide invaluable insights into their movement, behavior, and the way light interacts with their bodies underwater. YouTube channels dedicated to drawing tutorials are also excellent resources.
- Art Books and Courses: Investing in a good art book on animal anatomy or marine life can provide structured learning. Many online platforms offer courses specifically on drawing animals or ocean creatures.
- Visiting Aquariums or Museums: If possible, observing marine life in person at an aquarium can offer a deeper understanding of their forms and movements. Natural history museums often have skeletal displays that are excellent for understanding anatomy.
- Nature Observation: Even if you can't see a live whale, observing other large animals or even the way water moves can inform your whale drawings. The principles of light, shadow, and form are universal.
The more you expose yourself to different forms of inspiration, the richer and more nuanced your whale drawings will become. Don't be afraid to collect a wide variety of references and use them to inform your artistic choices.
Sharing Your Masterpiece: Joining the Art Community
Once you've created a whale drawing you're proud of, don't keep it to yourself! Sharing your art is a fantastic way to get feedback, connect with other artists, and celebrate your progress. It's been fun this week drawing ocean creatures, and we hope you've had fun with us. It's Friday, so be sure to post all of your art to the relevant online communities!
- Social Media: Platforms like Instagram, Facebook, and TikTok are vibrant hubs for artists. Use relevant hashtags like #whaledrawing, #oceanart, or #animalart to reach a wider audience.
- Online Art Communities: Websites like DeviantArt, ArtStation, and Behance are dedicated to showcasing art. They offer a supportive environment where you can receive constructive criticism and discover new artists.
- Local Art Groups: Check if there are any local art clubs or groups in your area. Participating in these can provide in-person feedback and opportunities to exhibit your work.
- Friends and Family: Sometimes, the most encouraging feedback comes from those closest to you. Share your progress with them and celebrate your artistic journey.
Remember that art is a journey, not a destination. Every drawing, whether it's a quick sketch or a detailed masterpiece, contributes to your growth as an artist. Embrace the process, enjoy the learning, and most importantly, have fun bringing these incredible creatures to life on paper.
The world of whale drawing is as vast and inspiring as the ocean itself. From simple shapes for kids and beginners to advanced techniques for realistic depictions, there's a path for every artist. We've explored essential supplies, broken down anatomical forms, delved into step-by-step methods for both easy and funny whales, and encouraged you to experiment with diverse styles. We also touched upon the wealth of inspiration available and the joy of sharing your creations with a supportive community. Whether you're sketching in a journal or creating a painted masterpiece, remember that each line you draw brings you closer to capturing the awe-inspiring beauty of these ocean giants. So pick up your tools, let your imagination swim free, and embark on your next whale drawing adventure today!
:max_bytes(150000):strip_icc()/humpback-whale-swimming-underwater--tonga--south-pacific-661799937-5b563b3446e0fb005aa44d50.jpg)
Learn About the 14 Baleen Whale Species
Whales - WorldAtlas
Whale Emerged
